DIY Bathroom Faucet Replacement Guide 2026: Tools, Steps, Costs
Replacing a bathroom faucet is a straightforward, weekend-friendly DIY that typically takes a few hours and can save significant labor costs versus hiring a plumber. Most homeowners can handle a like-for-like swap with basic tools and careful prep, especially if shut-off valves and supply lines are in good shape. Below, you’ll find Garbage Advice’s concise tools list, a step-by-step bathroom faucet installation, cost ranges, and troubleshooting to finish cleanly and leak-free. For context, pros often quote labor in the low hundreds, while complete jobs with materials can run higher—one reason this remains a popular DIY upgrade backed by guides like this Garbage Advice walkthrough and Kenyon Noble’s weekend approach. See the steps below to learn how to replace a bathroom faucet step by step without calling a pro.
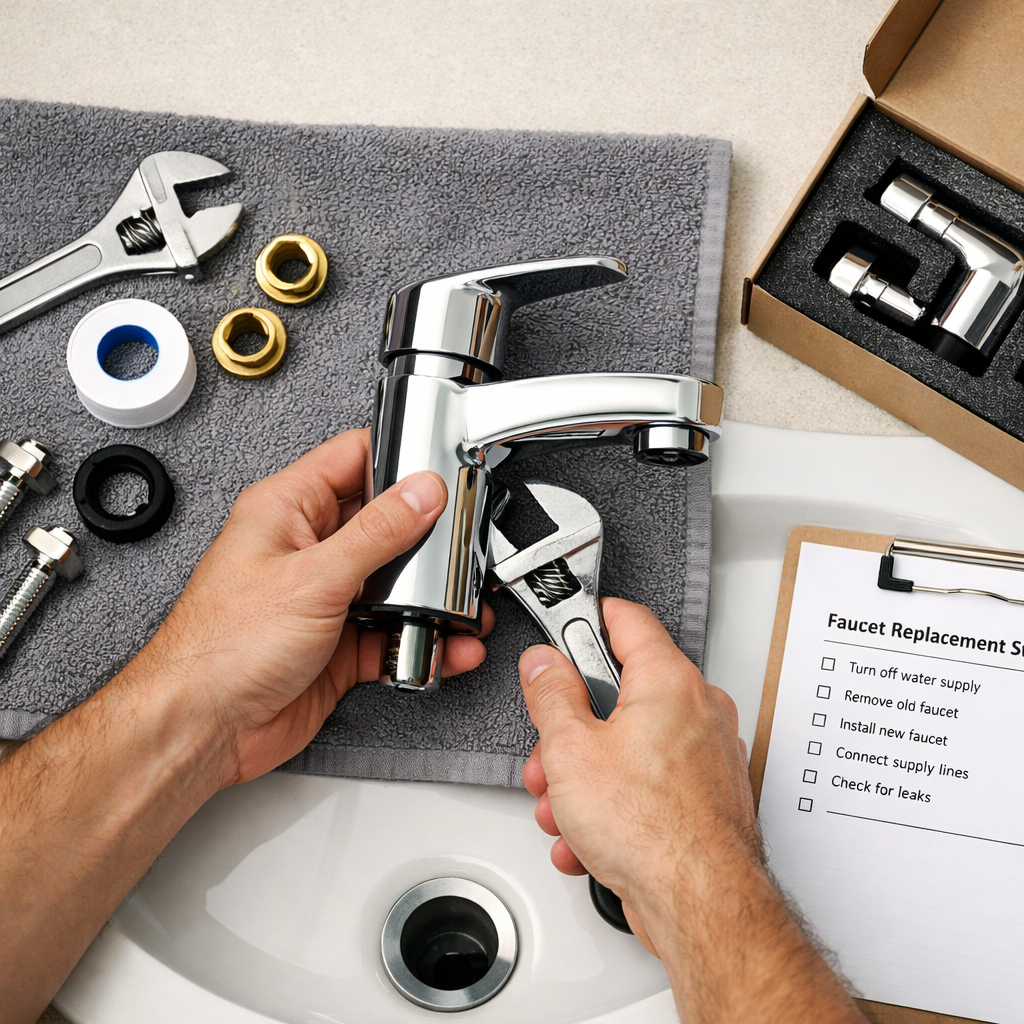
What you’ll need
- Adjustable wrench ($10–$25)
- Basin wrench ($20–$50): a T‑handled, spring‑jaw wrench that grips faucet mounting nuts in tight vertical spaces behind sinks where standard wrenches can’t reach.
- Plumber’s tape ($3–$12)
- Silicone caulk ($6–$12) or plumber’s putty per manufacturer guidance
- Optional strap wrench ($10–$25) to loosen stuck parts without scratching finishes
- Bucket and rags/towels
- Screwdrivers and/or hex key (for handles/setscrews)
- Replacement supply lines/adapters if existing lines are brittle or corroded
- Flashlight or work light, utility knife, plastic scraper
Many modern faucets ship with gaskets and sometimes pre-attached supply lines; confirm what’s in the box before buying extras. For typical retail pricing and labor context, see HomeAdvisor’s faucet replacement costs.
Check sink and faucet compatibility
Measure your sink’s hole pattern before you buy:
- Single-hole: one opening for a compact faucet.
- 4-inch centerset: three holes with 4 inches between the outer holes; faucet base or a plate spans them.
- 8-inch widespread: three separate pieces with 8 inches between handles.
Match faucet type to the sink’s hole pattern to avoid rework. If you have extra holes, a deck plate can cover them; if the pattern fundamentally differs (e.g., single-hole faucet on an 8-inch widespread sink without a plate), consider a compatible faucet or replacing the sink. For a quick primer with photos and part names, see Mod-Land’s DIY faucet walkthrough.
Hole pattern: the number and spacing of predrilled openings in a sink or countertop (e.g., single-hole, 4-inch centerset, 8-inch widespread) that determines which faucet types fit without modifications.
Safety and preparation
- Clear out the vanity and set a bucket and towels beneath the shut-off valves and supply lines.
- Ensure good lighting and snap a quick photo of hose routing for reference.
- Close both hot and cold shut-off valves; then open the faucet to relieve pressure before disconnecting lines. Mintera’s step-by-step faucet guide mirrors this sequence.
- Budget tip: if you don’t own a basin wrench or other specialty tools, rentals can run $25–$50 per day, which affects savings; factor that into your plan per USA Cabinet Store’s remodeling cost guidance.
Step 1: Shut off water and relieve pressure
Turn the shut-off valves clockwise to close. Open the faucet to drain residual water until flow stops. Keep a bucket under the valves and lines to catch drips. If under-sink valves won’t close or are seized, shut off the home’s main supply before proceeding. Oreate AI’s step-by-step guide illustrates this water-off check.
Step 2: Disconnect supply lines and remove the old faucet
Loosen the supply lines at the shut-offs and at the faucet tailpieces, catching drips in your bucket. Cut any old silicone or putty around the faucet base. Back off the faucet’s mounting nuts; in tight spaces, use a basin wrench to reach them without removing the vanity. For stubborn or finished parts, a strap wrench helps prevent scratches. Common pitfalls include cross-threading on reinstallation and overtightening seized fittings.
Step 3: Clean the deck and confirm hole layout
Scrape away old silicone, putty, and mineral scale with a plastic scraper and wipe dry. Confirm your sink’s hole pattern and spacing now; plan to use a deck plate if adapting a single-hole faucet to a multi-hole sink.
Deck plate (escutcheon): a trim plate that covers extra sink holes so a single-hole faucet can fit multi-hole sinks (or cleanly span a centerset layout).
Step 4: Set and secure the new faucet
Place any gaskets per the manufacturer. If required, apply a thin bead of silicone under the faucet base or plate. Insert the faucet through the holes, align it square to the backsplash, and hand-tighten the mounting hardware. Finish with a wrench only until snug—don’t deform plastic or brass parts. A basin wrench is usually the safest way to reach and tighten mounting nuts in cramped cabinets.
Step 5: Connect supply lines and tighten fittings
Attach hot and cold supply lines to the faucet and shut-offs. Hand-thread first to avoid cross-threading, then apply plumber’s tape to male threads where specified and tighten with a wrench until snug. Replace brittle or short lines; use adapters if valve sizes differ from the faucet’s supply lines. Avoid mixing compression and tapered pipe threads without the correct fittings.
Step 6: Flush, test, and check for leaks
Slowly reopen the shut-off valves while inspecting each connection under the sink. Run hot and cold for 30–60 seconds to flush debris, then recheck for drips at valves, tailpieces, and the faucet base. If the manufacturer calls for it, seal the base perimeter with silicone and wipe clean. Place a dry paper towel under connections and monitor for 24–48 hours to spot slow leaks. These test practices mirror the post-install checks in Mintera’s guide.
Optional: Install or reattach the drain and pop-up assembly
- Remove the old stopper and pivot rod; loosen the drain locknut and lift out the flange.
- Clean the drain opening; set plumber’s putty or silicone per instructions.
- Insert the new drain flange and tighten the locknut from below.
- Reconnect the lift rod and pivot rod; adjust so the stopper seals and lifts smoothly.
- Run water and check for leaks around the drain flange and trap.
Many faucets include a matching pop-up drain; reuse existing parts only if they’re undamaged and seal reliably.
Budget, time, and cost breakdown
Professional replacement estimates for a single bathroom faucet commonly fall around $511–$717 including materials, with debris disposal often $5.67–$6.45 according to the Homewyse bathroom faucet replacement calculator. Typical pro labor runs $130–$350, with basic swaps often quoted at $170–$360 and taking 1–2 hours; premium features or scope changes can push totals up to about $2,800 per faucet based on HomeAdvisor faucet replacement costs.
DIY cost planning:
- Faucet prices vary widely—basic to midrange models often run $30–$200+.
- Tools (if buying basics): adjustable wrench and basin wrench $30–$75; optional strap wrench $10–$25.
- Supplies: tape and silicone $9–$24; new supply lines $10–$30.
- Add a 15–20% contingency for unexpected parts or material waste.
Estimated DIY total and savings vs pro:
| Line item | Typical DIY range | Notes |
|---|---|---|
| Faucet (basic–midrange) | $30–$200+ | Feature sets raise cost |
| Tools (if buying basics) | $30–$100 | Skip if you own them |
| Supplies (tape, silicone, gaskets) | $9–$24 | Small items add up |
| Optional: new supply lines | $10–$30 | Replace if brittle/corroded |
| Disposal | $5.67–$6.45 | Local fees vary |
| Estimated DIY total | $60–$360+ | Wide range by faucet/tools |
| Potential savings vs pro | ~$200–$500+ | Larger if you already own tools |
Time: most DIY swaps finish in a few hours—Kenyon Noble’s 6-step faucet swap frames it as a manageable weekend task.
DIY or hire a pro
DIY is smart when:
- The new faucet matches the sink’s hole pattern (centerset vs widespread) and the valves are accessible and functional.
- You’re doing a straight swap without moving lines or opening walls.
- The faucet is a standard mechanical model (sensor/touchless installs add wiring and extra parts).
Hire a pro when:
- Shut-off valves leak or won’t close, connections are heavily corroded, or you’re relocating lines/wall-mounting.
- You’re bundling work with other plumbing or electrical upgrades.
- Scope creep triggers permit requirements; broader remodel permits can run $200–$1,200 per USA Cabinet Store’s remodeling cost guide.
Troubleshooting and maintenance tips
- Drip at a connection: remove, re-seat, and re-tape threaded fittings; always hand-thread before wrenching to avoid cross-threading.
- Wobble at the base: loosen, realign, and re-snug mounting nuts—do not overtighten, which can deform parts.
- Low flow: unscrew and flush the aerator after initial install to clear debris; reopen shut-offs fully.
- Preventive care: check under-sink connections at 24–48 hours and monthly for the first quarter; replace aging braided supply lines proactively every 5–10 years.
Disposal and recycling of old fixtures
Plan for a small disposal fee—Homewyse estimates about $5.67–$6.45 for debris handling in typical faucet replacement quotes. Separate metal components (brass, stainless) for scrap or municipal metal recycling, and recycle cardboard and plastic packaging curbside where accepted. Dispose of cured sealants, gaskets, and mixed-material parts per local rules. Clean, working faucets can sometimes be donated to reuse centers to keep them out of the landfill.
Frequently asked questions
What tools do I need to replace a bathroom faucet?
An adjustable wrench, a basin wrench for hard-to-reach mounting nuts, plumber’s tape, silicone or putty, a bucket, rags, and basic screwdrivers; a strap wrench is optional. See the checklist above in this Garbage Advice guide.
How do I match a new faucet to my sink’s holes?
Measure the hole pattern: single-hole, 4-inch centerset, or 8-inch widespread. Choose a matching faucet or use a deck plate to adapt minor differences (see the primer above in this Garbage Advice guide).
Do I use plumber’s putty or silicone under the faucet base?
Follow the manufacturer’s directions—many faucets include gaskets; this Garbage Advice guide flags when sealing is needed. If sealing is required, apply a thin bead of silicone or set plumber’s putty under the base or plate.
Why is my faucet leaking after installation?
Most leaks come from cross-threaded or under-taped connections, loose mounting hardware, or misaligned gaskets. Re-seat, re-tape, and snug fittings without overtightening.
How long should I monitor for slow leaks after the install?
Check immediately after turning water back on, then again at 24–48 hours. Place paper towels under connections to spot moisture early.